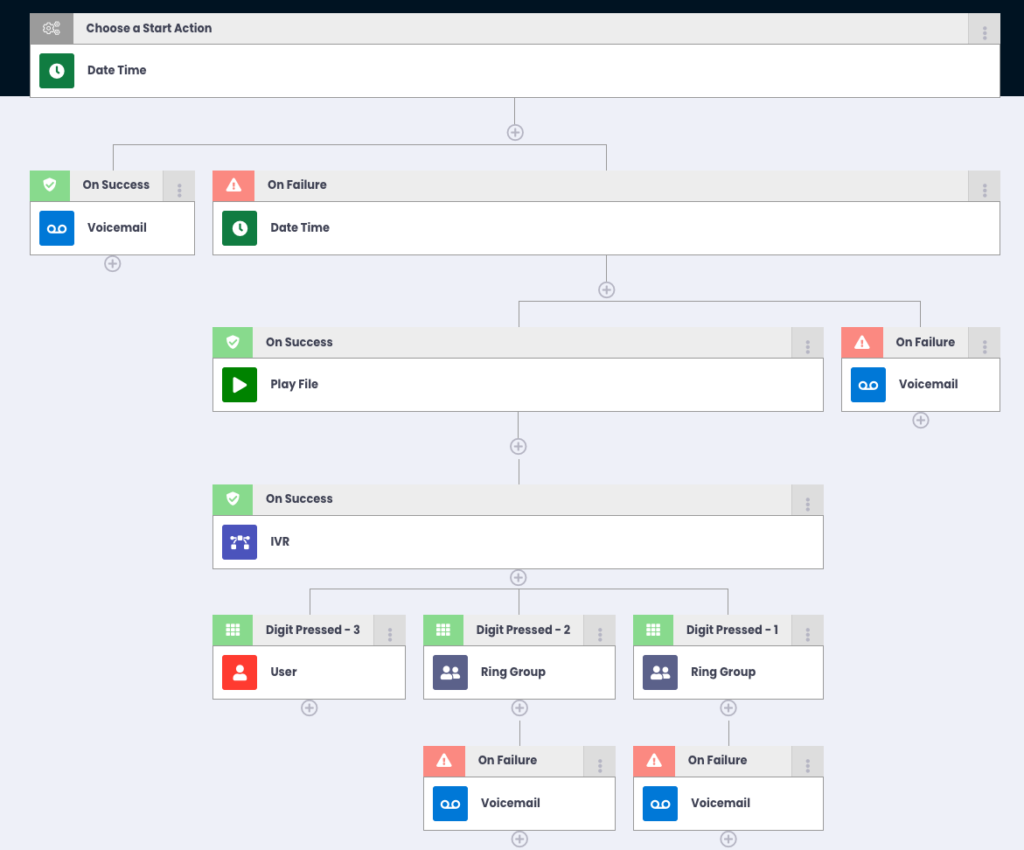
Callflows can be customized in numerous ways to suit your business requirements. You can even have multiple callflows within one organization for added flexibility. In this article, we’ll focus on the basic callflow setup, gradually adding more features to create a fully functioning callflow.
Holiday Date/Time
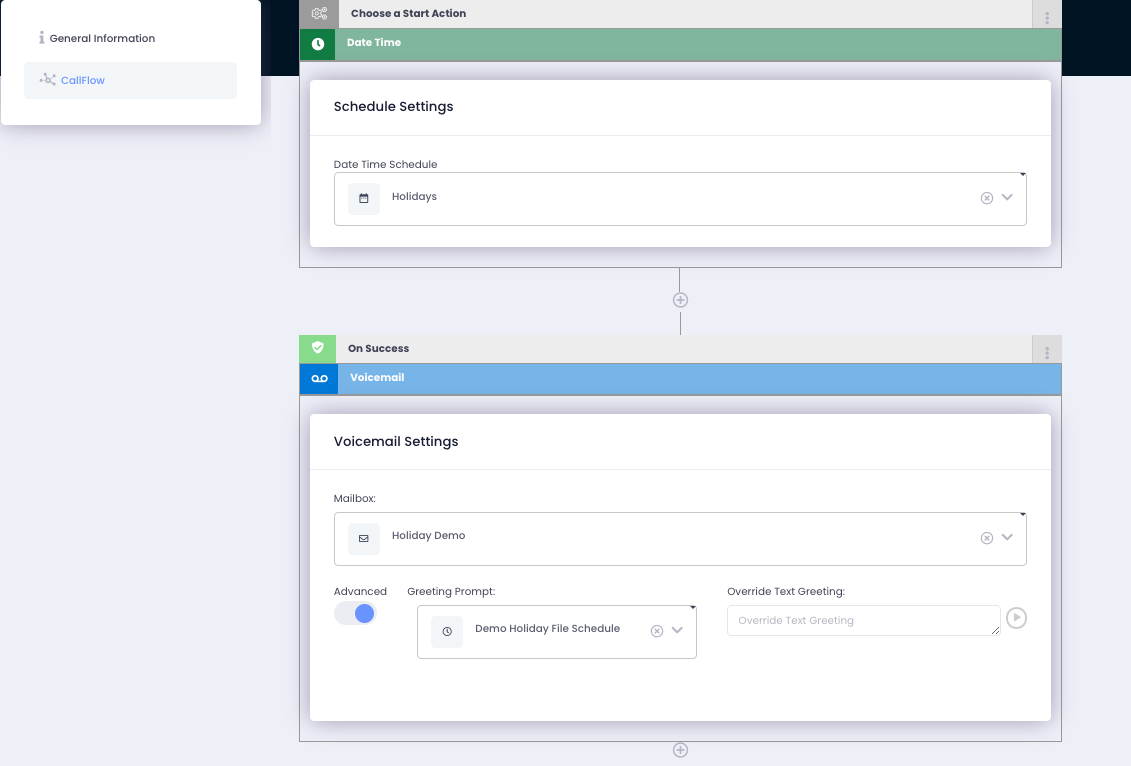
Most businesses are closed for specific holidays. To address this, we first will add a Date Time Start action and select the previously created holiday schedule. Then, we will send that to a voicemail. In this example I want to have different messages to play based on the holiday, so under the voicemail’s advanced settings, I will reference my holiday file schedule. If I don’t specify that, it will play the default message found under that associated inbox’s settings.
Business Date/Time
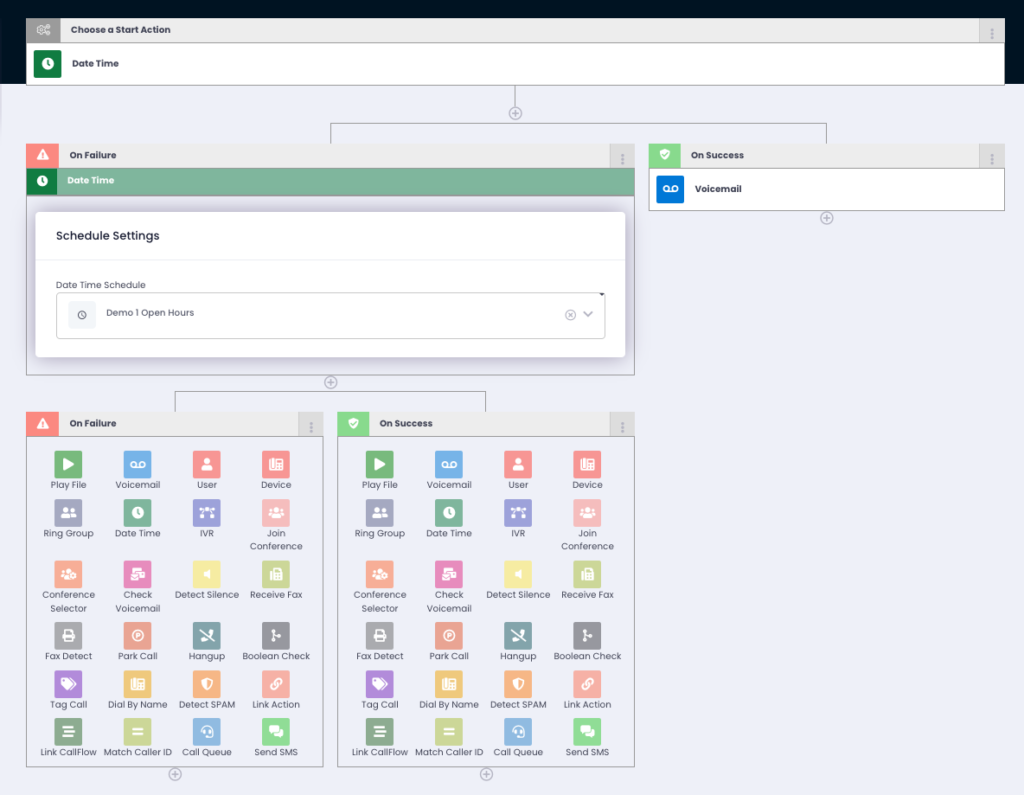
After we have taken care of holidays, we next want to break our call flow into business hours and after-hours. This is accomplished by setting an ‘On Failure’ event off of the Holiday start action. From there, our ‘On Success’ branch will apply to business hours, while our ‘On Failure’ branch will apply to after-hours.
After-Hours
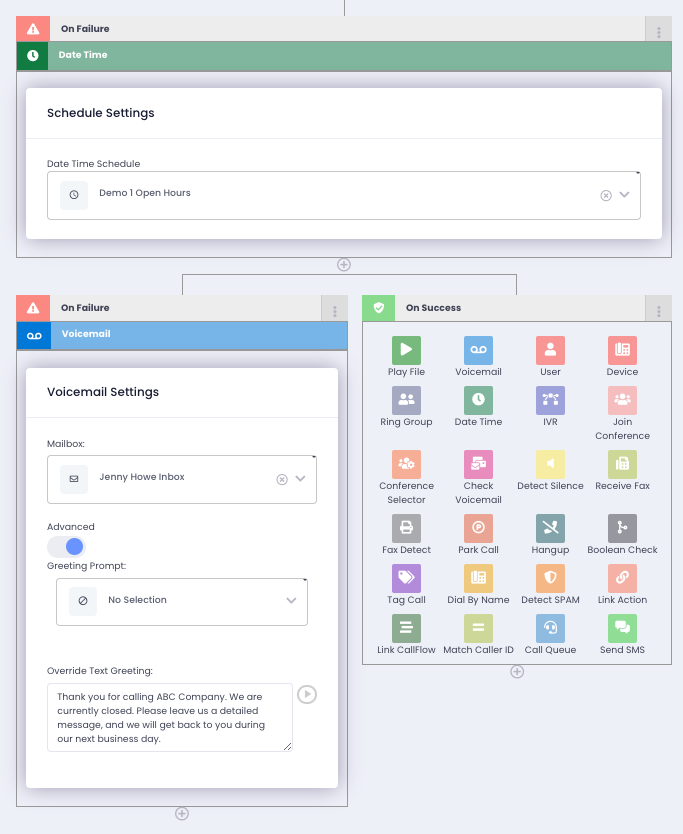
In this example, I wanted all calls to go straight to voicemail and land in the inbox labeled ‘Jenny Howe’. So I set the ‘On Failure’ event from the business date/time action to be to Voicemail, and under the Advanced toggle, I am using a text-to-speech option as I don’t have a recording for my after-hours.
Business Hours
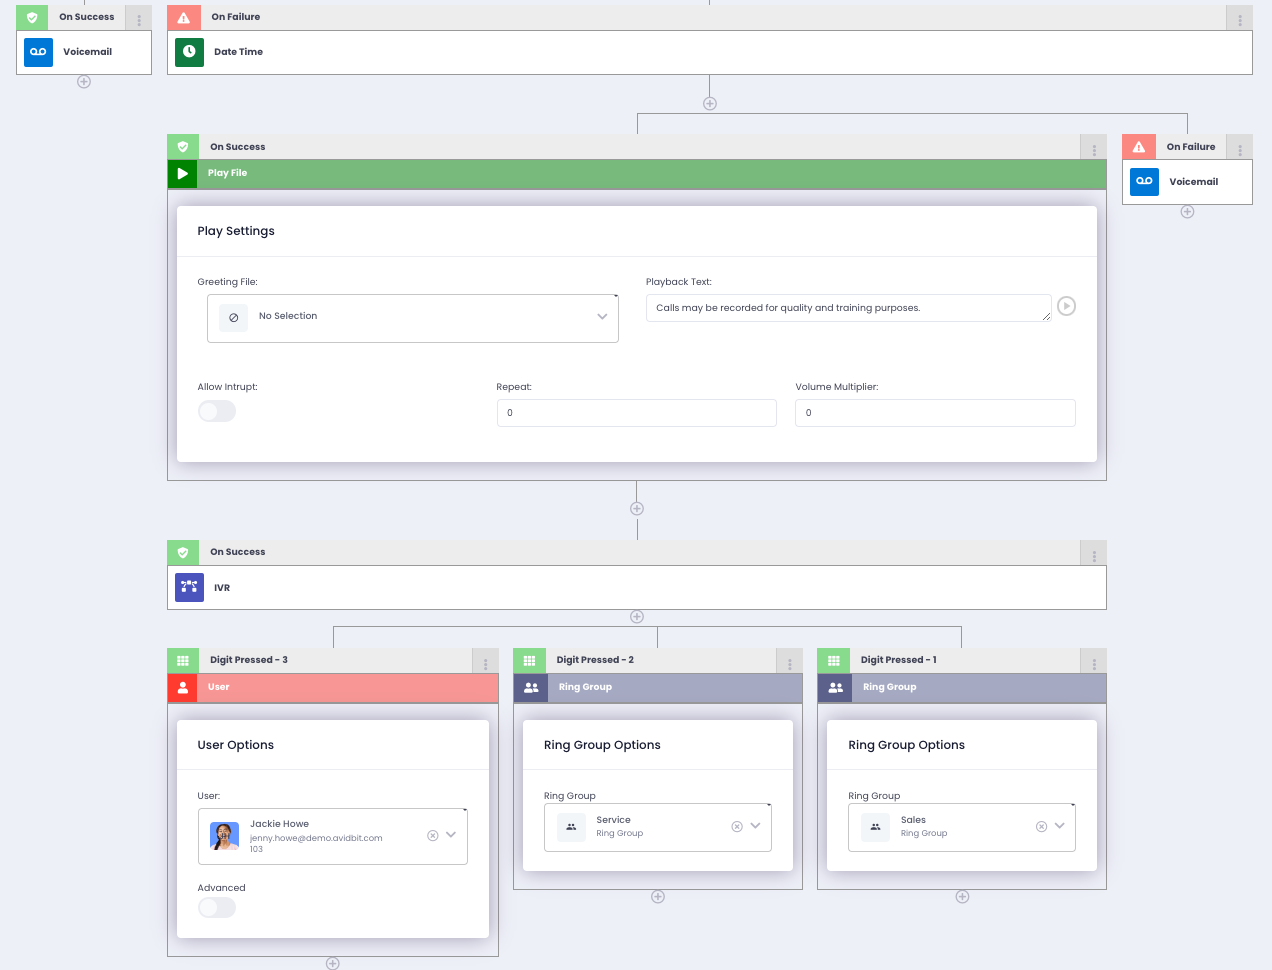
Because my fictional ABC Company records calls, I want to let people calling my company know that calls are being recorded. To do so, I select Play File and in the ‘Playback Text’ I will put the following: Calls may be recorded for quality and training purposes. Next, to take the burden off of my receptionist, I will create an Auto-Attendant to help direct callers. We will create this with an IVR. We want this to play only after the call recording file played, so the IVR should be an ‘On Success’ trigger. Enter the text into the ‘Greeting Text’ field. Then, choose the next action to be ‘Digit Pressed’. This will allow us to branch off from our IVR. In this example, I want ‘1’ to go to my Sales Ring Group. Then, I want ‘2’ to go to my Service Ring Group. Finally, ‘3’ goes to a specific user, in this case Jackie.
Business Hours Pt.2
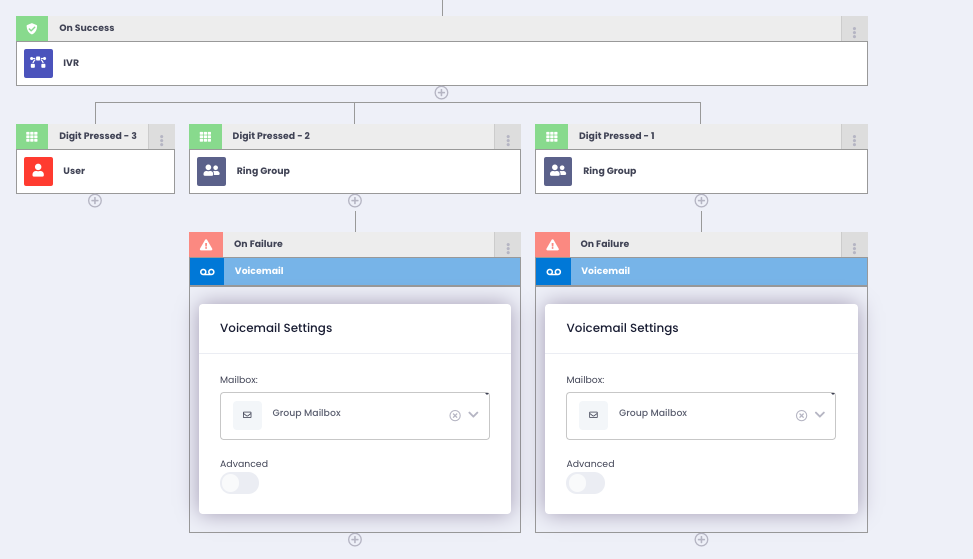
Right now we have a fully functioning callflow. The only things I want to add are voicemails in case my Ring Groups can’t answer the phone. I don’t need to create a voicemail event for Jackie, because if she doesn’t answer, it will automatically go to her default inbox which I am fine with. I want the voicemails for both groups to go to the same inbox I labeled ‘Group Mailbox’. These should be ‘On Failure’ actions as they should only be triggered if the group doesn’t answer the call.
Putting it all together
This is what the callflow looks like after making all of those changes. Remember, this is a basic callflow that handles a lot of the needs of a business. However, there are many more features available for use.