
Windows Desktop
- Inside of Google Chrome, navigate to my.avidbit.com (download Chrome if you don’t have it).
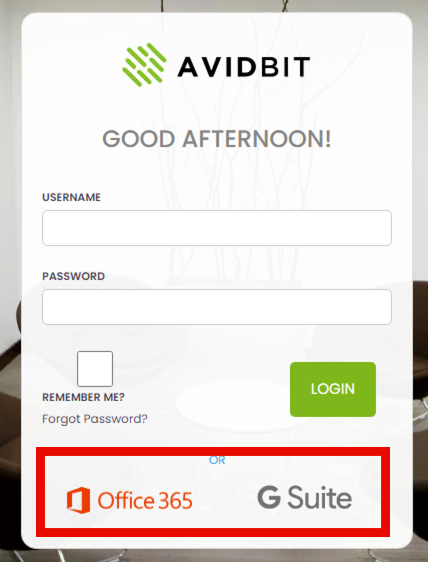
- Depending on your organization, select Office 365 or GSuite.
- Sign in with your work credentials.
- Once signed in, select the Install app icon.
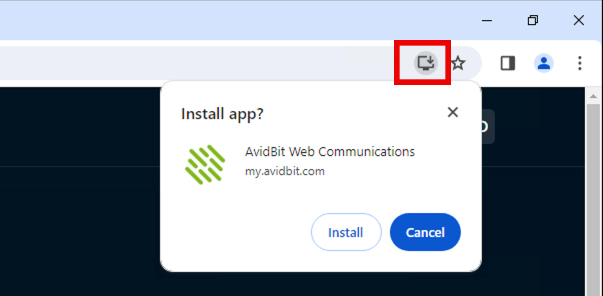
- Press Install when prompted.
- Once the application opens up, allow any notifications.
- Sign in again with your work credentials if prompted.
- Right click on the AvidBit logo in your taskbar and press Pin to taskbar.
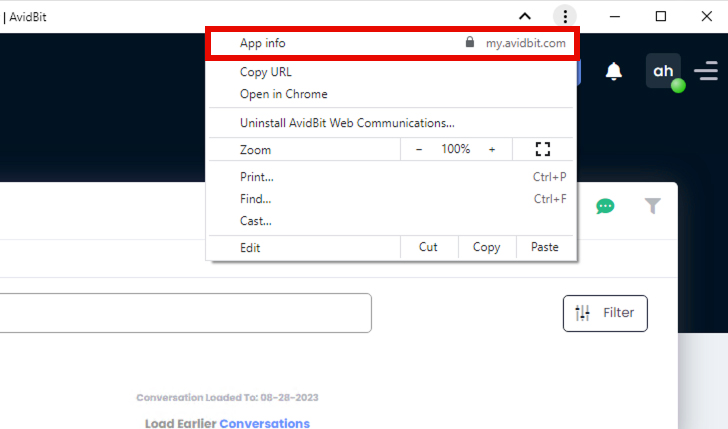
- Again, inside of the AvidBit desktop app, select the three vertical dots in the top right corner.
- Select App Info.
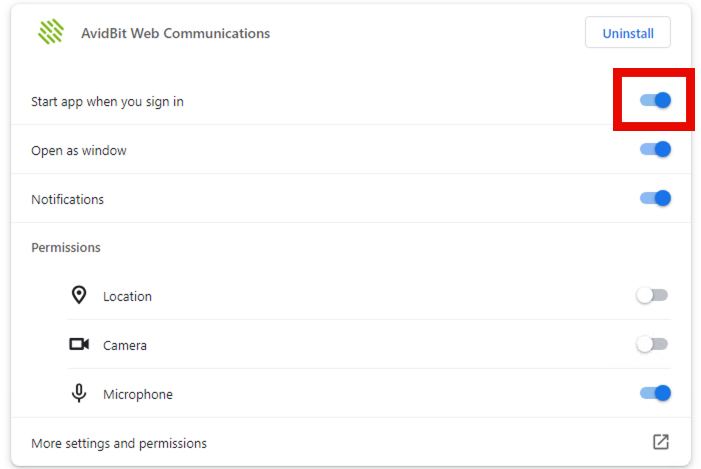
- Select Settings.
- Toggle ON “Start app when you sign in”.
- Back inside of the AvidBit app, select your initials from the top right corner.
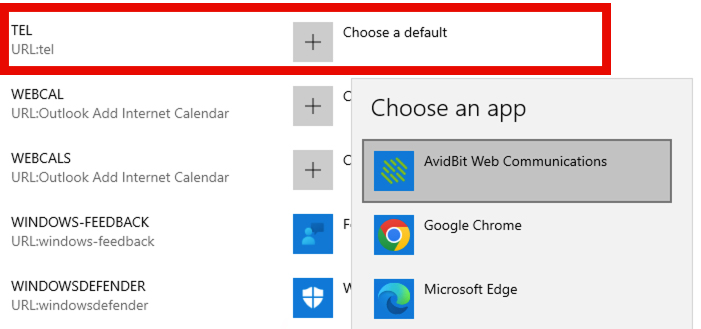
- Scroll to the bottom and toggle ON “Override on Device”.
- Select the ‘Default Communication Device’ drop down menu.
- Choose the device you make calls from. Generally you will select your desk phone or your cell phone. However, if you are only using your desktop, leave the device selected to your computer and do the following:
- Scroll up to Web Phone Settings
- Toggle ON ‘Enable Web Phone’, put in a name for the device like John Laptop, and grant it permissions.
- You are now setup on your computer.
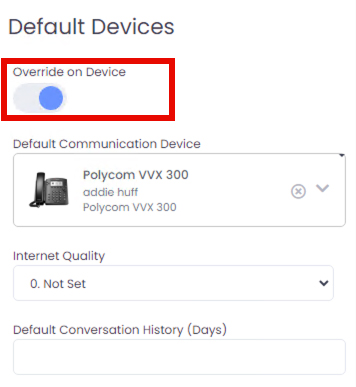
19. Navigate to the windows search bar in the bottom left of your screen.
20. Start typing in “Default Apps” and select it when it finds a match.
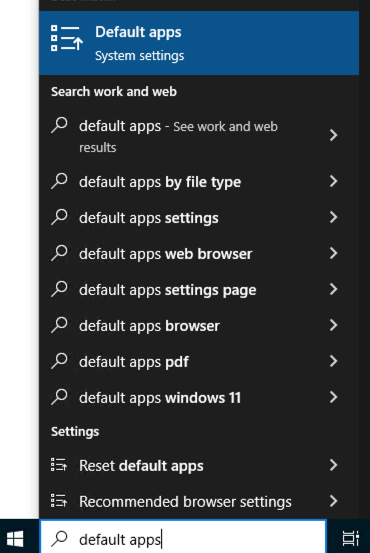
21. Scroll down and click on Default apps by protocol.
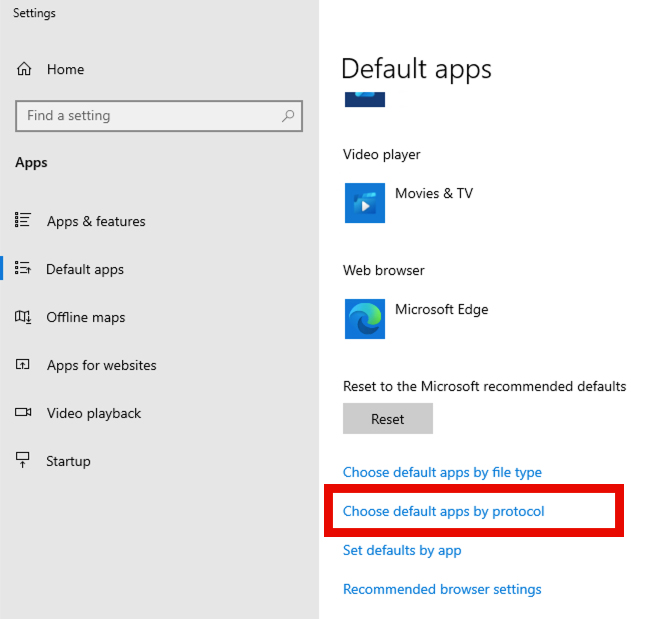
22. Scroll down until you see TEL. There should be no app next to TEL. Click and select AvidBit.
Mac Desktop
- Follow steps 1-13 above for “Windows Desktop”.
- Open FaceTime on your Mac.
- In the menu bar at the top of the desktop screen, select FaceTime. You should see it from these options: FaceTime, Edit, Video, Window, Help.
- Select Settings.
- In the ‘Default for calls’ field, select AvidBit Web Communications.
- Back inside of the AvidBit app, select your initials from the top right corner.
- Scroll to the bottom and toggle ON “Override on Device”.
- Select the ‘Default Communication Device’ drop down menu.
- Choose the device you make calls from. Generally you will select your desk phone or your cell phone. However, if you are only using your desktop, leave the device selected to your computer.
- You are now setup on your computer.
iPhone
- Inside of Safari, navigate to my.avidbit.com.
- Depending on your organization, select Office 365 or GSuite.
- Sign in with your work credentials.
- Upon sign in, select the share button inside of Safari from the bottom of the screen.
- Click Add to Home Screen.
- Go into the app on your home screen.
- Sign in with your work credentials again.
- Select your initials from the top right corner.
- Scroll to the bottom and toggle ON “Override on Device”.
- Select the ‘Default Communication Device’ drop down menu.
- Choose the device you want to make calls from. Generally you will select your cell phone (if you do not see that here, it means there is no current device attached to the user. Learn to do that here).
- You are now setup on your phone.
Android
- Inside of Google Chrome, navigate to my.avidbit.com.
- Depending on your organization, select Office 365 or GSuite.
- Sign in with your work credentials.
- Upon sign in, select the menu button inside of Chrome (horizontal three dots).
- Select Install app or Add to Home Screen. If you do not have this option, search the Play Store for AvidBit Early Development.
- Go into the app on your home screen.
- Sign in with your work credentials again.
- Select your initials from the top right corner.
- Scroll to the bottom and toggle ON “Override on Device”.
- Select the ‘Default Communication Device’ drop down menu.
- Choose the device you want to make calls from. Generally you will select your cell phone (if you do not see that here, it means there is no current device attached to the user. Learn to do that here).
- You are now setup on your phone.