Using the desk phone to update an existing mailbox
- Press the mailbox icon on the physical desk phone. This will allow you to listen to voicemails from all of your inboxes.
- Press * to enter your voicemail settings. Listen to and select which inbox you would like to edit.
- After a few moments, you will be greeted with a new menu, “you are editing the settings on the mailbox called [mailbox name]”.
- Press 2 to begin recording your message after the tone.
- Once you have finished recording, press any key to continue.
- The audio will be played back to you. Press 1 to save and apply that voicemail, or press 2 to redo the message.
- The voicemail will be updated upon saving.
Using the desk phone to create a new voicemail
- Dial *99 (including the *) to enter the recording menu. Simply wait for the tone, leave your message, and press any key to exit.
- Once you have confirmed your voicemail, the file with be found under Settings -> Files. It will have the name ‘Auto Prompt Recording @’.
- This file can then be applied anywhere that accepts a voicemail such as inboxes, callflows, or file schedules. See the screenshots below for some examples.
Recording a new file using the AvidBit app
- From the top toolbar, select Settings.
- Under the Account category, select Files.
- Click ‘Add File‘ and select ‘Add a Recording’.
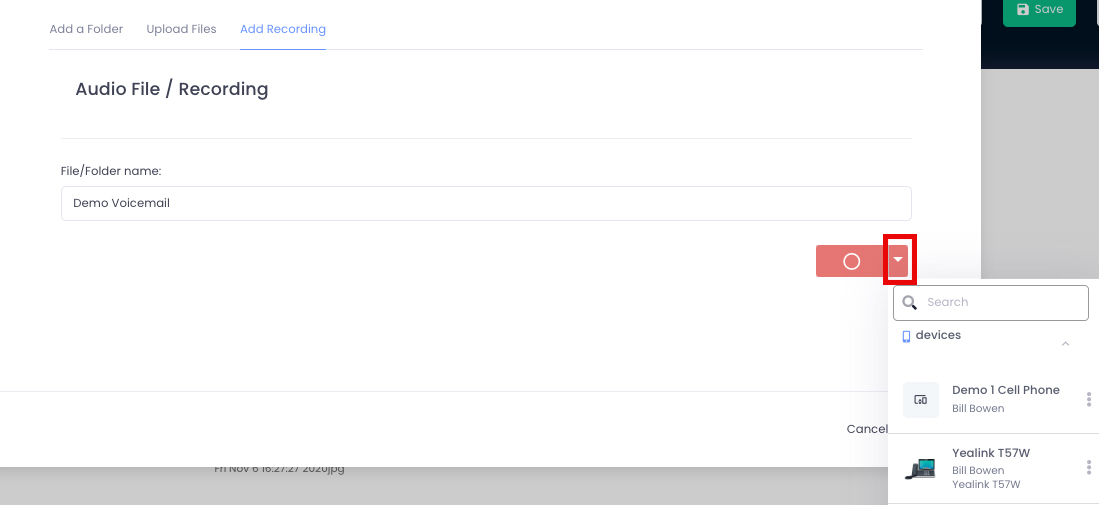
- Select the drop down list next to the red record button, and select which device you would like to record from. Whichever device is selected here will be the device that the voicemail will be recorded on.
- Press the red record button to begin the recording prompt. This prompt will both play and record from whatever device was selected in the previous step.
- Once recorded, press the green play button on the AvidBit portal to hear your message.
- Give the recording a name in the ‘File/Folder name’ field.
- Press Save.
- Now that the file has been created, we need to assign it to an inbox.
- Navigate to Settings -> Inboxes.
- Click the inbox you wish to add this to.
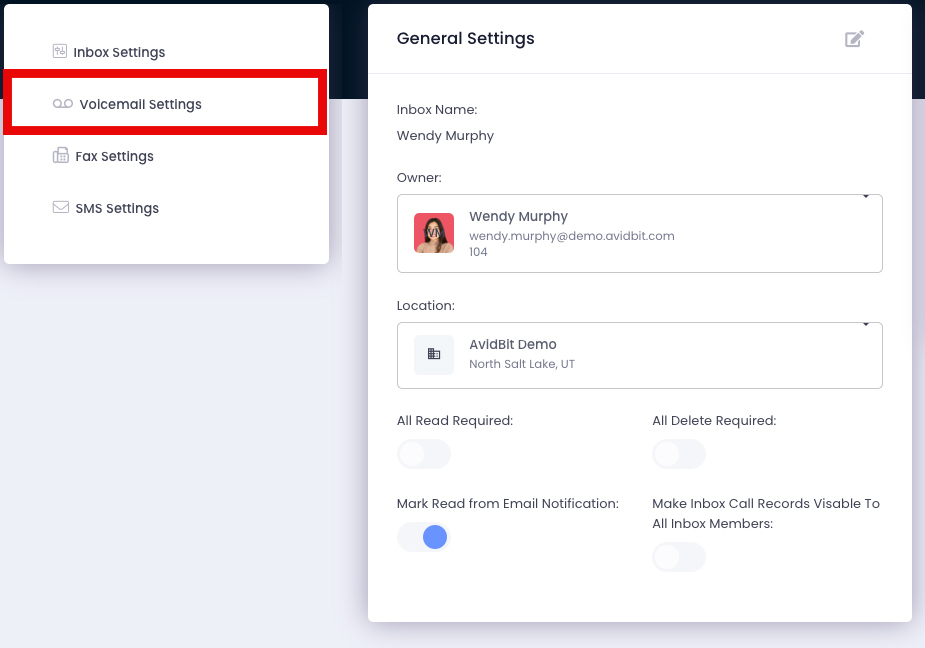
- Select ‘Voicemail Settings’ from the left pane.
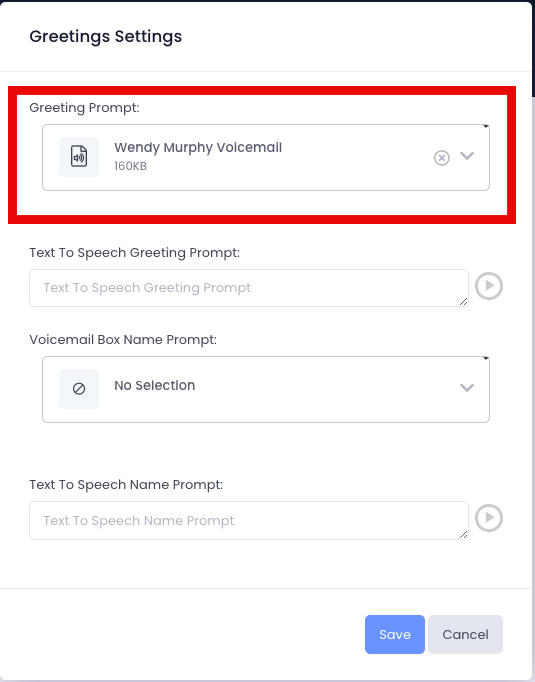
- On the right pane labeled ‘Greetings Settings’ click the edit button in the top right corner.
- Select the Greeting Prompt drop down menu and select the file you just created.
- Press Save.
Using Text-To-Speech
- From the top toolbar select Settings.
- Under the Voice category, select Inboxes.
- Select the inbox you wish to add a voicemail greeting to.
- On the left pane, select Voicemail Settings.
- Navigate to the ‘Greetings Settings’ box on the right side of the screen.
- Select the edit button in the top right.
- Navigate to the ‘Text To Speech Greeting Prompt’ and type in the message.
- Press the play button to create the necessary speech file in our system (wait until you hear the whole message before moving on).
- Press Save.
Using a pre-recorded message
*Steps 7-14 are very similar to Using Text-to-Speech
- From the top toolbar select Settings.
- Under the Account category, select Files.
- Click the blue + Add in the top right corner.
- Click ‘Choose File’.
- Locate the pre-recorded message on your computer (supported formats: .wav .mp3).
- Press Save.
- From the top toolbar select Settings.
- Under the Voice category, select Inboxes.
- Select the inbox you wish to edit.
- On the left side, select Voicemail Settings.
- Navigate to the ‘Greetings Settings’ box on the right side of the screen.
- Select the edit button in the top right.
- Navigate to to the ‘Greeting Prompt’ and select the file from the drop down list.
- Press Save.
Using a File Schedule
File Schedules allow for different voicemails based on a schedule. In other words, if you want a different voicemail for different scenarios e.g. holidays, after-hours, business hours, you will use a file schedule. While it is possible to use a file schedule for an individual user’s inbox, it is mostly used for the company’s main call flow.
Prerequisites: A schedule must be created first. Click here to learn how to do this.
- From the top toolbar select Settings.
- Under the Account category, select Files.
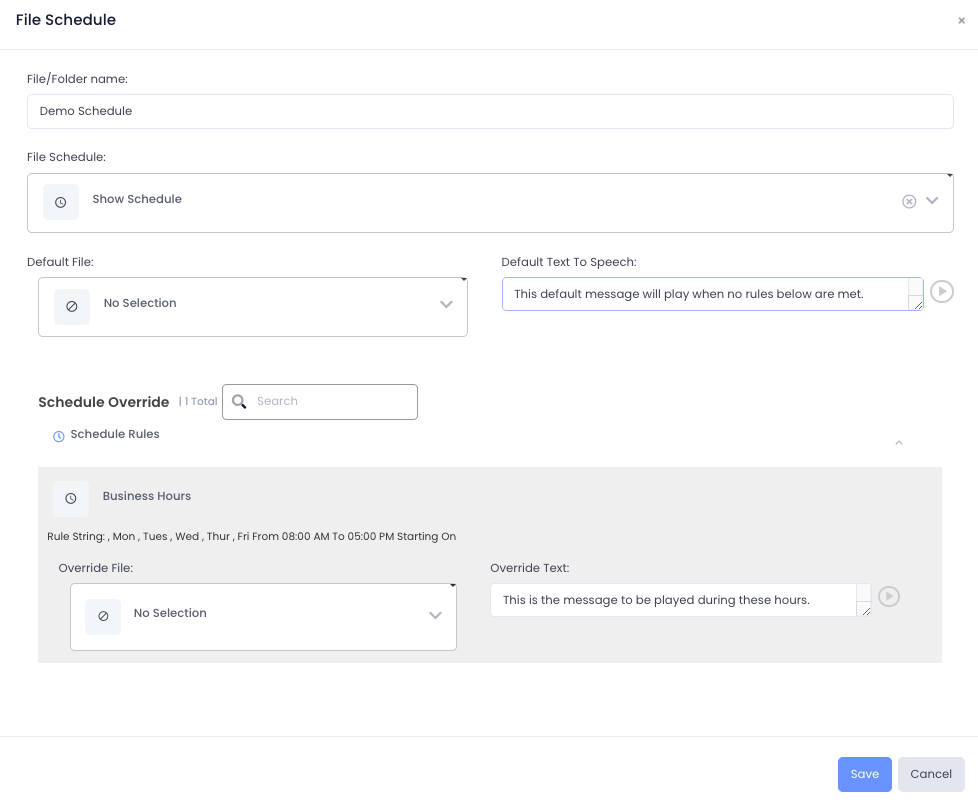
- Click the Add File in the top right corner and select Add a File Schedule.
- Give the file schedule a descriptive name.
- From the ‘File Schedule’ drop down list, select the previously created schedule.
- The Default File / Default Text To Speech refers to what message will play after all other schedule rules are false . These rule(s) are created during schedule setup here.
- The Override File / Override Text is the message that will be played if the ‘Rule String’ is true.
- Press Save.
- You can now use this file schedule as your greeting prompt which can be used in the Callflow or on an Inbox Greeting by choosing the Greeting Prompt drop down in the respective areas.