There are many places that you can change what Caller ID you are using. This can be set for a location, a user, or a phone number. This article covers all options for setting up Outbound/Inbound Caller ID as well as your Emergency Caller ID.
Changing what number you call/text from
Option 1:
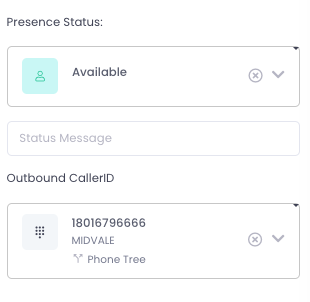
Within the AvidBit app, click on your initials in the upper right corner
The drop down menu under “Outbound CallerID” shows what your current CallerID is. To change this, click on the drop down menu, and select which number you would like to use outbound.
Option 2:
Inside of the Communicator, within a previous conversation or upon a new message, you will see a number in top right of the conversation pane. Select this drop down menu to change which number you are messaging from. The dial-pad screen does not include an option to change which number you choose from currently. It will use whichever number is selected using Option 1.
Changing Caller ID for Location
- From the top toolbar, select Settings.
- Under the Account category, select Location.
- Click which location (most likely you will just have one to choose from).
- In the left pane, navigate to Voice.
- In the right pane labeled “Caller ID”, click the edit button.
- Make sure that ‘Override Internal CallerID Presets’ is toggled ON.
- Fill out / replace all the necessary info.
- Press Save.
- Internal Name
- Internal Number
- External Name
- External Number
- Emergency Name
- Emergency Number
The name you want to appear as when you call within the organization.
The number you want to appear when you call within the organization (typically this would be the same number as an extension).
The name you want to appear when you call outside the organization.
The number you want to appear when you call outside the organization.
Use the same ‘External Name’ unless you would like a different name .
Use the same ‘External Number’ unless you would like to use a different number.
Changing Caller ID for a User
- From the top toolbar, select Settings.
- Under the Account category, select Users.
- Select the user you wish to edit.
- Follow steps 4-8 for ‘Changing Caller ID for Location’.
Changing Caller ID for a Number (this makes a public listing)
- From the top toolbar, select Settings.
- Under the Voice category, select Numbers.
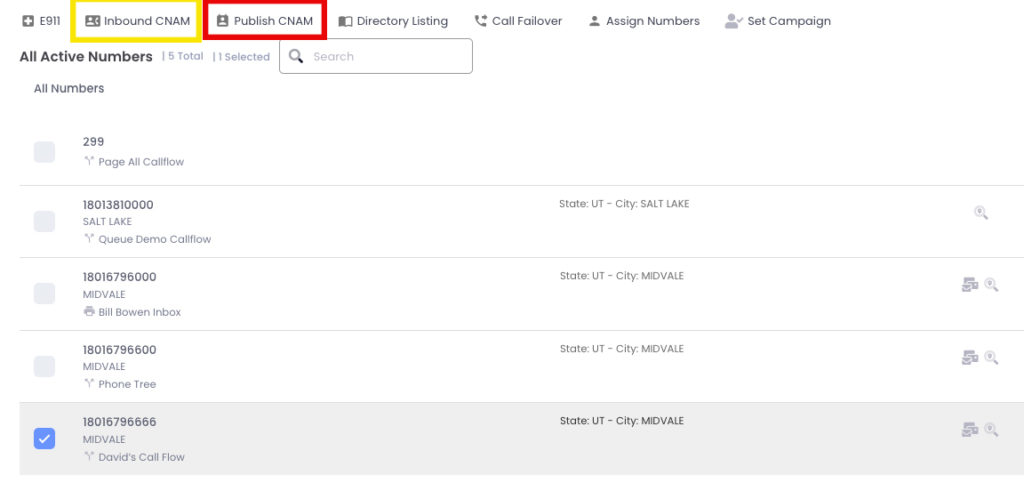
- Click on the dial pad icon to the left of the phone number to select it.
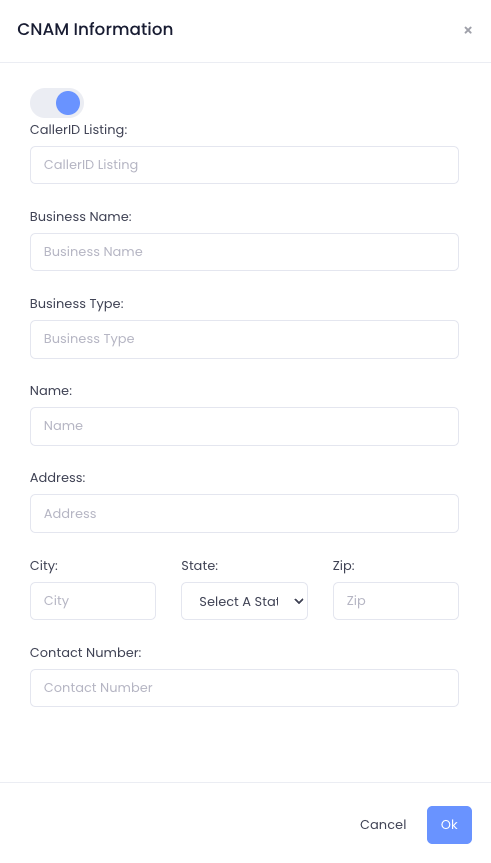
- At the top of that pane, select Publish CNAM.
- Toggle ON and fill out the information you would like to add.
- Press Save.
- To activate inbound caller ID lookup on that number, select Inbound CNAM.
- Toggle ON Caller ID Lookup Enabled.
Setting E911
- From the top toolbar, select Settings.
- Under the Voice category, select Numbers.
- Click on the dial pad icon to the left of the phone number to select it.
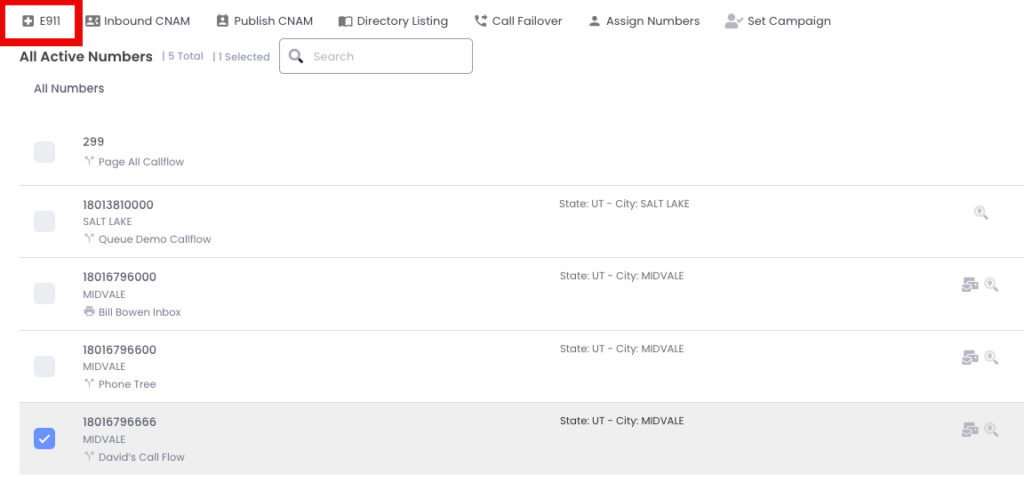
- At the top of that pane, select E911.
- Toggle ON and fill out the information you would like to add.
- Press Save.